One of a great things about Lambda functions is that you can’t SSH into it.
This sounds like a drawback, but actually it’s a great security benefit — you can’t hack what you can’t access. Although it’s rare to see SSH used as an entry path for attackers these days, it’s not uncommon to see organizations lose SSH keys every once in a while. So cutting down SSH access does limit the attack surface of the lambda — plus the fact, that the lambda doesn’t exist on a 24/7 server helps reduce that even further.
Your support engineers might still want to log onto a **server**, but in todays serverless paradigm, this is unnecessary. After all, logs no longer exists in /var/logs they’re on cloudwatch, and there is no need to change passwords or purge files because the lambdas recycle themselves after a while anyway. Leave those lambda functions alone will ya!
As a developer, you might want to see what is **in** the lambda function itself — like what binaries are available (and their versions), or what libraries and environment variables are set. For this, it’s far more effective to just log onto a lambci docker container — Amazon work very closely with lambci to ensure their container matches what’s available in a Lambda environment. Just run any of the following
docker run -ti lambci/lambda:build-python3.7 bashdocker run -ti lambci/lambda:build-python3.6 bash
Lambci provide a corresponding docker container for all AWS runtimes, they even provide a build image for each runtime, that comes prepackaged with tools like bash, gcc-c++, git and zip. This is the best way to explore a lambda function in interactive mode, and build lambda layers on.
But sometimes you’ll find yourself wanting to explore the actual lambda function you ran, like checking if the binary in the lambda layer was packaged correctly, or just seeing if a file was correctly downloaded into /tmp— local deploy has it’s limits, and that’s what this post is for.
Why no shell
Obviously the first problem is that a Lambda function exposes no ports. Nada! Zilch! Secondly, even if you could bind to a port — Lambdas run in an AWS VPC that is NAT-ed. Hence you’re stuck behind a NAT, even after exposing the port.
And this dear friends, is where hackers would tell you to use a Reverse Shell!
What the hell is a reverse shell??!!
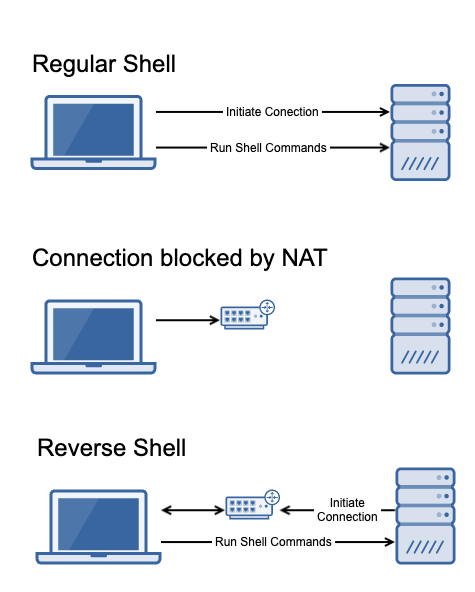
Glad you asked — a normal Shell is when you log onto a server, and execute Shell commands on it. A reverse shell is when the server logs onto you and, you execute commands on it.
The ‘reverse’ part refers to who initiates the connection. The typical usage is when you’ve compromise a server through some traditional exploit and obtained remote code execution — but that server is behind a NAT that prevents ingress connections. However, NATs don’t stop outgoing connections from a server — do they? So if we could somehow get the lambda function to initiate the shell, we’re good as gold!
And that’s where areverse shell comes in.
After compromising a server, you spin up a listener to receive the incoming connections — and then instruct your compromised server to initiate a reverse shell to that listener. Granting you an interactive shell on the exploited machine.

Using Hacker techniques for Devs
So let’s take this hacker technique and get ourselves an interactive shell on a Lambda Function. After all, it’s **our** lambda function, hence we’ve already code code execution capability!
So what do we do?
First we package a wildly out-dated, but very useful version of netcat. This version actually gives us simple commands to initiate a reverse shell to any listening ip and port. Fortunately, there’s a publicly available layer with netcat already published on Klayers (a github repo I made, that’s full of cool layers).
Next we spin up a lambda using this layer, and the bash runtime for our lambda function — to give us access to real bash commands.
Then we create a bash script, that simply initiates a reverse shell to a ip and port provided in our EVENT object, and load that into the functions execution code (in this bash runtime, the event object is simply $1).
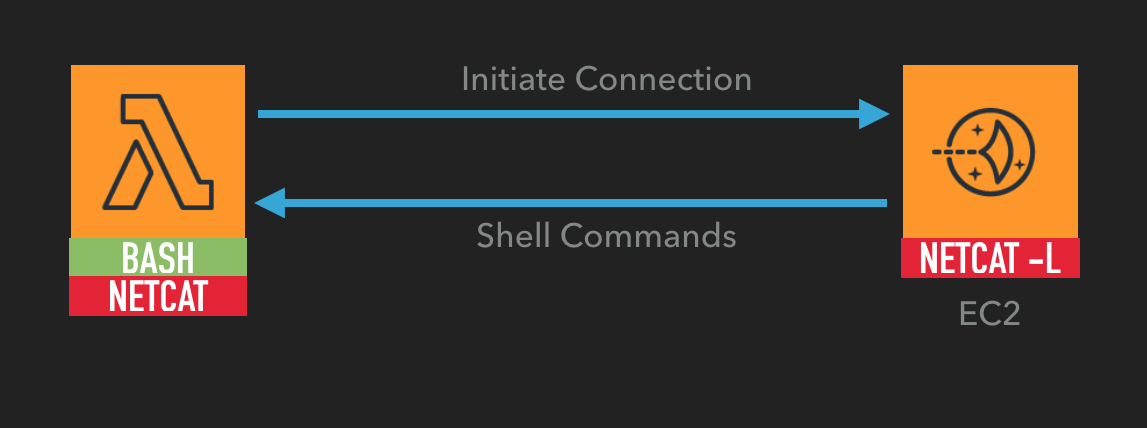
And finally, we’d spin up an EC2 instance (or any other server) to run our listener on. Eventually, the whole setup looks something like this:

Results
The GitHub repo with all this code is here.
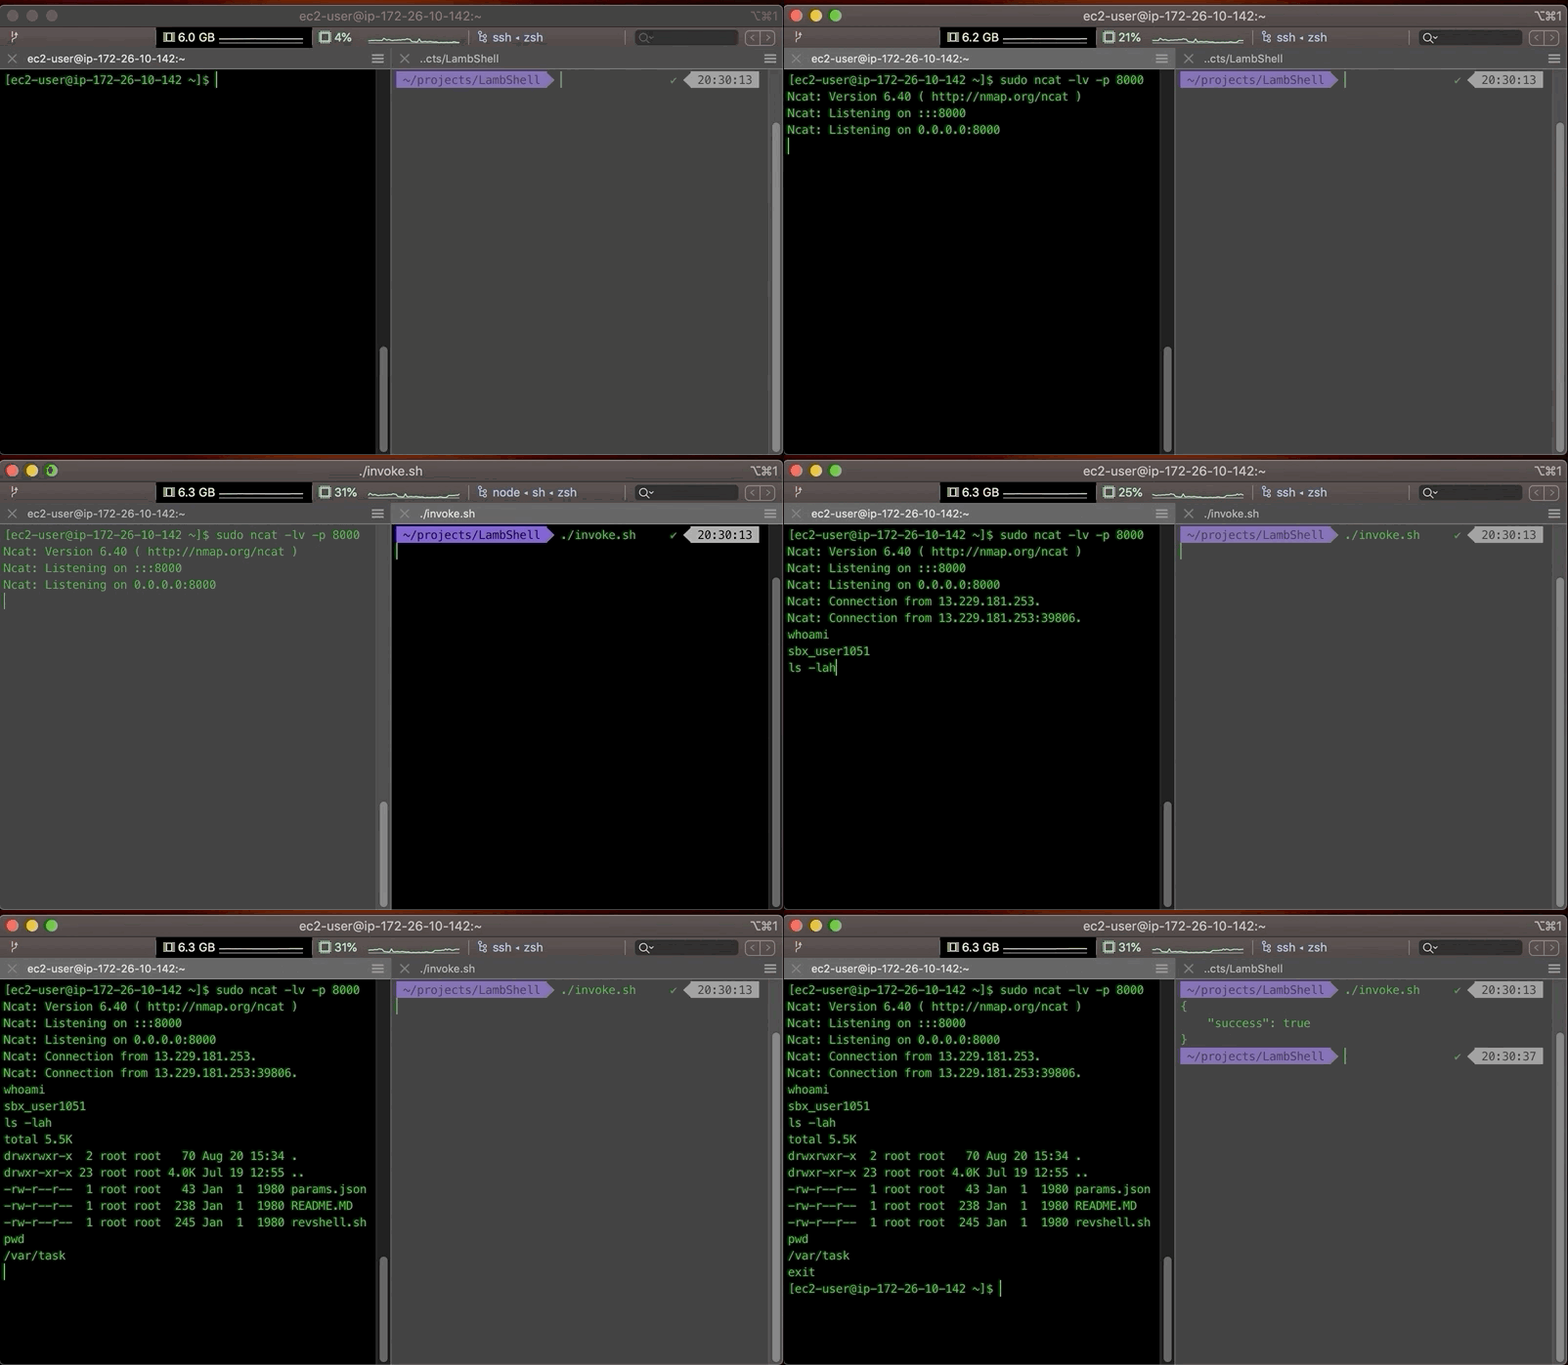
Finally the results look something like this:

If you like this content, please consider starring this github repo, or the Klayers github repo — or both!