This weekend, I decided to learn me some Vim.
According to it’s website, “Vim is a highly configurable text editor built to make creating and changing any kind of text very efficient” — to be honest, I only used vim when forced to from the command line, I wasn’t sure why anyone would choose to do ‘serious’ editing in Vim.
Vim is notoriously hard — so hard, that millions of developers get stuck just trying the exit the damn program. If you have an interface so difficult to understand that people can’t intuitively do something mundane like exit — you know you’re dealing with something very user-unfriendly.
But…..
I also knew that Vim was powerful, and millions of other folks who invested the time to learn the damn thing swear by it. Vim’s real power comes from the keyboard shortcuts — which allow you to quickly move/edit different lines of text in a file without ever touching the mouse. Some of this is Geek-Snobbery, a elitist feeling of pride when you manage to execute something without ever touching the dreaded ‘mouse’ — but truthfully keyboard typing is not much faster than a mouse, it’s also more accurate, leaving less mistakes — which means going even faster.
So what did I learn?
First, the default system installation of Vim on macbook has some limitations. You’re better off installing the brew version, by simply brew install vim. Make sure you restart your shell, so that the new installation can take effect — or checking running which vim to see if it points to /usr/local/bin, instead of /usr/bin
Next, you’ll create to a vim configuration file in ~/.vimrc. This file configures your vim settings, for my bare-bones setup to reconfigure vim for yaml, I used the following :
Side Note: Vim has a large plugin ecosystem. But unlike wordpress, or vscode there is no in-built marketplace to search and install them. The two plugins I installed, was done via git clones to a specific folder: ~/.vim/pack/vendor/start/<plugin_name>
There’s too many vim commands to go through in one article, and certainly too many to memorize over a weekend. But I found that practicing my vim skills on frequent use-cases with my yaml files helped. So there they are:
To search for something on vim, we use the / followed by the string to search for. To exit the search function, we press <ENTER> and then use ‘n’ for the next instance of the string. You’d think that ‘p’ would be for previous, but unfortunately that was reserved for paste, so you’ll have to use <SHIFT>-‘n’ (or N) to get the previous instance of the searched string.
So, if you’re opening a config file and looking for the 3rd instance of a string like POWERLEVEL9K_SHORTEN_STRATEGY, you simply enter the following
/SHORTEN_STRATEGY<ENTER>nnnNeat! Sure beats scrolling through the file with nano, or having to exit the terminal by opening the file in vscode or sublimetext.
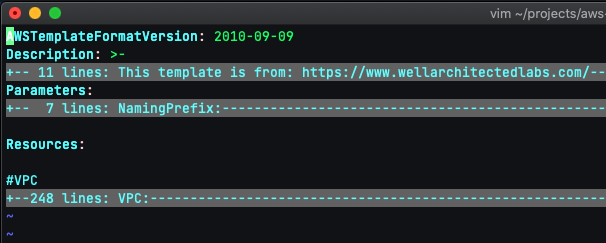
Next up, I decided to try some yaml editing, which is something I do often in my daily workflow. For this, I installed two plugins, namely indent-line-plugin and vim-yaml-folds. Both of these together with my .vimrc file, cause a 300 line cloudformation template to open like so:

For YAML, we’d like to use some ‘folding’ that’s when certain blocks of text are folded into a single line to long files readable on the terminal. To un-fold the entire file we just toggle folding off by entering zi , or just za to toggle the folding on a specific section.
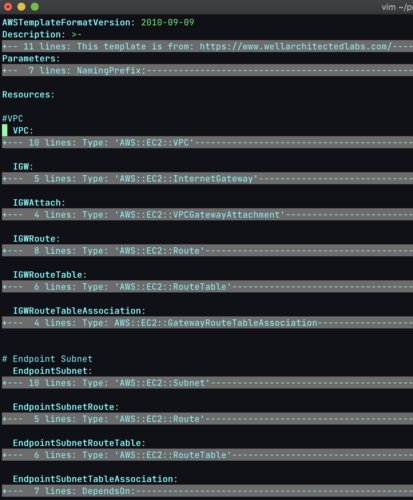
I could then unpack the last folded line of that code to reveal this:

From there, I could repeat that process over again, all without scrolling through on a keyboard. This method is more precise that the ctrl-f method I’d use in a text editor.
We can quickly scroll through a folded document using zj and zk, which is kinda intutitive since j and k both map to down and up respectively.
Finally, I couldn’t figure out how to select entire blocks in a single command — I could select the start of block in ‘visual’ mode and then type in j for each line I would like to select, for example
vjjjjjBut that felt like a waste of keystrokes, instead I noticed that if you spaced out each block with a newline, you could select each block using the paragraph command. For example the following command would select 2 blocks of text, and deletes them. (there’s 3 ‘ip’ because you select one block, the new line between them, and the 2nd block).
vipipipdLastly, if we’re unpacking this via keyboard, it’s usually recommended to use a single line cloudformation intrinsic functions rather than multi-line ones. It just makes it easier to unpack the entire resource:
