 Ever since they took down drop.io I’ve been struggling to find a site where I could share content/files with my developers and service providers. I work for the IT department of a multinational company and sometimes I require to share content with developers and service providers that are not from my company (and therefore don’t share access to the intranet). I’m sure many people struggle with this, how do I share those large files with my team?
The short answer is email, email offers the simplest method to share files, but email has a limit, usually to the tune of 5MB. Anything bigger and email just won’t cut it.
The next option is services like dropbox and yousendit.com, but my company’s network provider has already begun blocking these sites. Also, some of them require a registration in order to download, and that’s big turn off.
If you’re looking for a comparison of these websites, techcrunch has a brilliant round-up here. (warning: it is an old link)
If you’re still reading, chances are you’ve already tried these options. So you’re here, wondering what you can do. The solution is quite simple, if you have your own website hosted on a site like dreamhost.com that offers unlimited bandwidth and storage for a fixed monthly sum, why waste that? You can turn your website into a cool AWESOME file sharing utility.
Think of the people you’d impress in the office, as the person who successful manages the office illegal collection of MP3’s. Repository of informational documents.
The script behind it is super simple, and I’ll show you how to configure this with minimal fuss on Dreamhost. The reason why I’m not having a tutorial for nearlyfreespeech, is that nearlyfreespeech’s charges would skyrocket the instant you start using it to transfer Gigabytes of data. That being said, I still love nearlyfreespeech and it’s one of the best web host out there for low volume blogs like mine, what I’m about to show you however will eat bandwidth and storage, so it’s better to go with a unlimited hosting solution.
Step1: Download the scripts
Click here to download the scripts in zip format.
Step2: UNzip the scripts anywhere on your webpage.
For this e.g. I’m unzipping it to a sub-domain of mine, in my other website, jomlunch. http://socialize.jomlunch.com
Step3: Configure the file(s)
Open the config.php file of the folder and change the value for PASSWORD. This password would protect both uploads and downloads.
define(‘PASSWORD’, ‘Enter your password here”);
Step4: Change the permissions of the folders
You need to change the permissions of the /uploads folder and the config.php. This protects the files from being viewed by nefarious people, you’re not fully protecting the files, but protecting them enough for this example. This prevents anyone from just typing in the url of the link and downloading the file, so the only way anyone is going to access the uploaded file is via the php script and that requires a password.
Change the permission for the upload folder to 744
Change the permission for the config.php file to 700
Step 5: Modify the php.ini on Dreamhost.
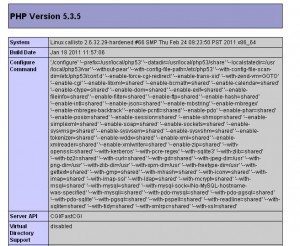
If you unzip the files correctly, and you browsed to the info.php file with your internet browser, you’ll see something like this:
Look for these 2 values:
post_max_size = 12M
upload_max_filesize = 7M
Here is where it gets specific for the webhost. The default setting for Dreamhost is just 12MB per upload, this is WAAAY to small. To increase this, you’ll need to change these values. Dreamhost has a pretty
simple way to change the php.ini settings
Step 5.1 Upgrade your site to PHP5.3
Upgrade your website to PHP5.3
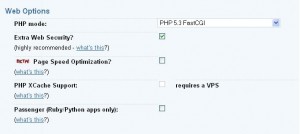
Go to your domains->Edit the domain and under the web options select PHP5.3 FAST CGI from the list

Step 5.2 upload a new php.ini file
This is simpler than it sounds.
In your main folder (the one you see when you logon to sFTP, i.e. root\home\user_name), create a folder called “.php” remember the “.”.
Then create another folder called “5.3” in that, and finally create a file called phprc. At the end you’ll the path of the file would be .php\5.3\phprc
Then just change the contents of the file to the following:
post_max_size = 128M
upload_max_filesize = 128M
This overrides the default php setting of Dreamhost. To double check this, view the info.php file again. Sometimes it takes 5-10 minutes for these changes to be reflected so don’t get too excited if it doesn’t work instantly.
Step 6: Give it a test drive.
The scripts should work, if you give it a test drive. If you wish to increase the size to greater than 128MB, you’ll also need to change the value of the “MAX_FILE_SIZE” parameter in the index.php file.
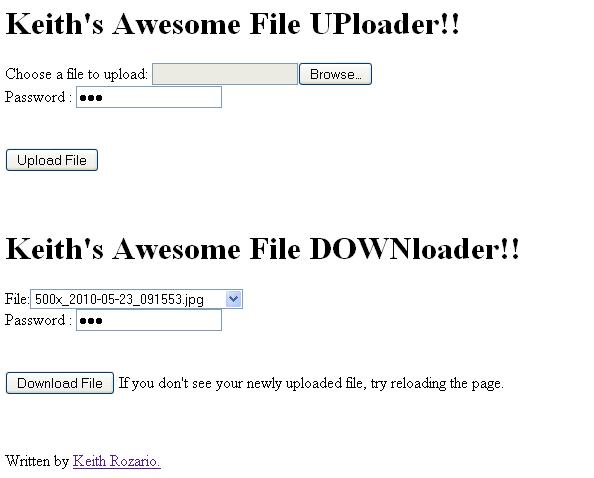
Finally you’ll be able to see, Keith’s Awesome File Up&Down loader. The design of the site leaves much to be desired, I’m hoping someone could help me out there.
Preview of the site:
If you’re still interested, try my awesome file uploader over at www.keithrozario.com/uploads, use ‘KEITHisAWESOME’.


it doesnt allow people to download the files
Yeap, sorry I had changed the passwords. But if you download the scripts and execute them on your own server it should work.
Is it down?
Yes Brandon, sorry for that.
If you download the scripts and run them on your own server they should work. I’ve stopped hosting with dreamhost and no longer have an unlimited bandwidth host to run the script on.
You can also try minus.com, which is pretty decent.
Amazon S3 and dropbox are obviously the kings in this area.
Sorry about that, contact me via email if you want more info.
[…] Storage seems to the in thing these days. With the launch of Google Drive, my previous post on how to create a site to share large files seem a bit irrelevant, and with the even hotter news that Google and Microsoft may launch their own […]
[…] are a couple of ways you can share files on the web for free, for instance you can create a website to share your files (although that depends on whether you have a hosting plan) or you use websites like minus.com to […]
Any chance of getting the files back up? Link 404’s